SMALL PETS & BIRDS
DIY Foraging Toys for Budget Bird Owners: 5 Ideas Under $15
Build five budget-friendly foraging toys for your bird using coin wrappers, cupcake liners, old books, sauce cups, and plastic cups for under $15 total. Each project includes step-by-step instructions and safety tips to match your bird's size and chewing style.
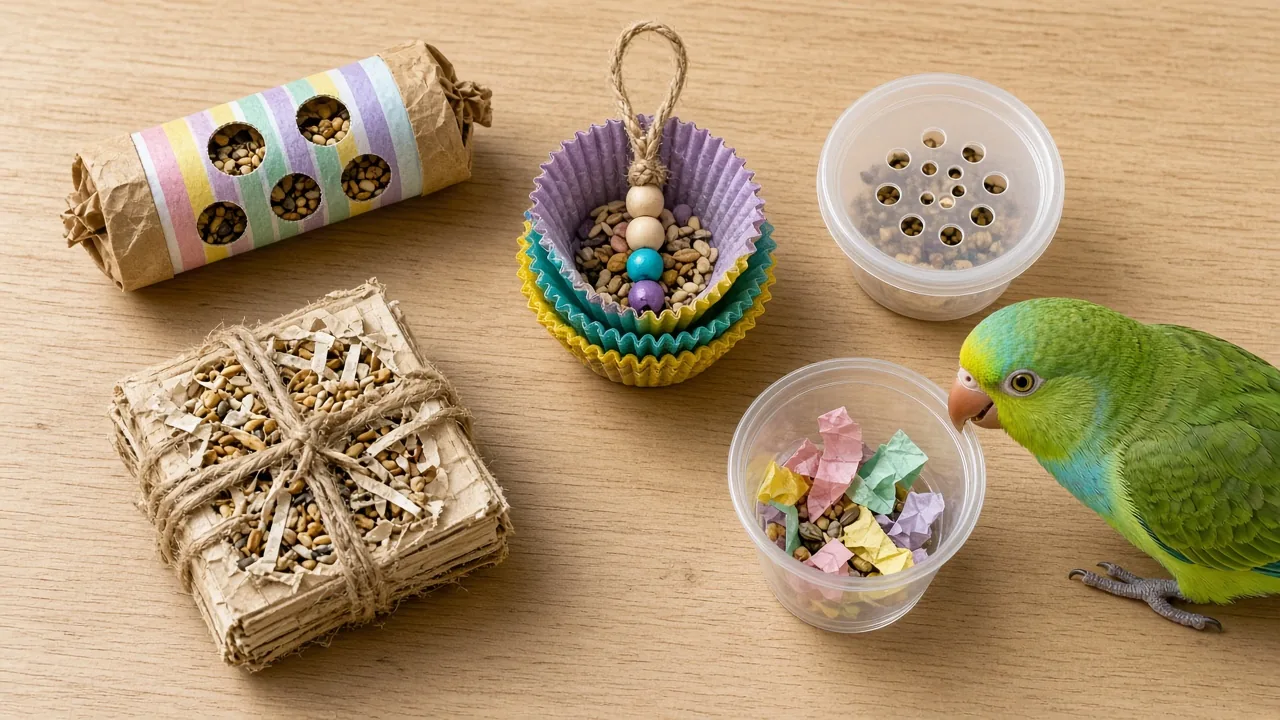
If you want to keep your bird busy without spending much, you can make five different foraging toys from dollar store supplies for less than $15 combined. These DIY foraging toys for budget bird owners use coin wrappers, cupcake liners, old books, sauce cups, and plastic cups you likely already have on hand or can pick up on a quick errand run. None require special tools beyond a drill, scissors, and a little patience.
Why Foraging Toys Matter and What Makes a Material Bird-Safe
Birds forage for food in the wild for most of their waking hours. Searching, shredding, and problem-solving to find a meal is a core behavior, not a bonus activity. When a pet bird’s food shows up in a bowl with no effort required, that instinct still exists but has nowhere to go.
Foraging toys give that instinct an outlet. They slow down fast eaters, give idle beaks something productive to do, and can reduce feather plucking and excess screaming that sometimes comes from boredom.
Every material in a homemade toy needs to meet one baseline standard first: it has to be bird safe. That means no treated wood, no loose threads that can wrap around toes or necks, and no small parts a bird’s particular beak strength could crack off and swallow. Size matters as much as material. A piece that is safe for a large parrot’s beak can be a choking risk for a smaller bird.
Are Dollar Store Materials Safe for Birds?
Dollar store shelves hold a mix of genuinely useful and genuinely risky bird toy supplies, so you have to look at each item with your specific bird in mind rather than assuming anything labeled as craft or kitchen supplies is automatically fine.
Plastic beads are a good example of this split. They work well for parrots with strong beaks that can grip and move a bead without crushing it into shards. A smaller bird, like a budgie or a lovebird, can sometimes bite a plastic bead hard enough to crack it, and a cracked piece becomes a swallowing hazard rather than a toy.
Paper, cardboard coin wrappers, jute twine, and unprinted cupcake liners tend to be safer bets across bird sizes because they shred into fiber rather than hard-edged chunks. Before you commit to a project, check that nothing is printed with ink that bleeds, coated in glue, or small enough to disappear down a curious beak.
5 DIY Foraging Toys for Budget Bird Owners Under $15
These five projects share a shopping list of coin wrappers, paper, cupcake liners, jute twine, plastic beads, a sauce cup with a lid, and a clear plastic cup or shot glass. Buying enough of each item to make all five toys, plus a bit of extra material for repairs, has run under $15 total for one bird owner who tracked the full cost.
You do not need to build every project in one sitting. Picking two or three that match your bird’s chewing style and skill level is a reasonable way to start, then adding the rest as your bird gets comfortable with foraging.
How to Make a Treat-Stuffed Coin Wrapper Toy
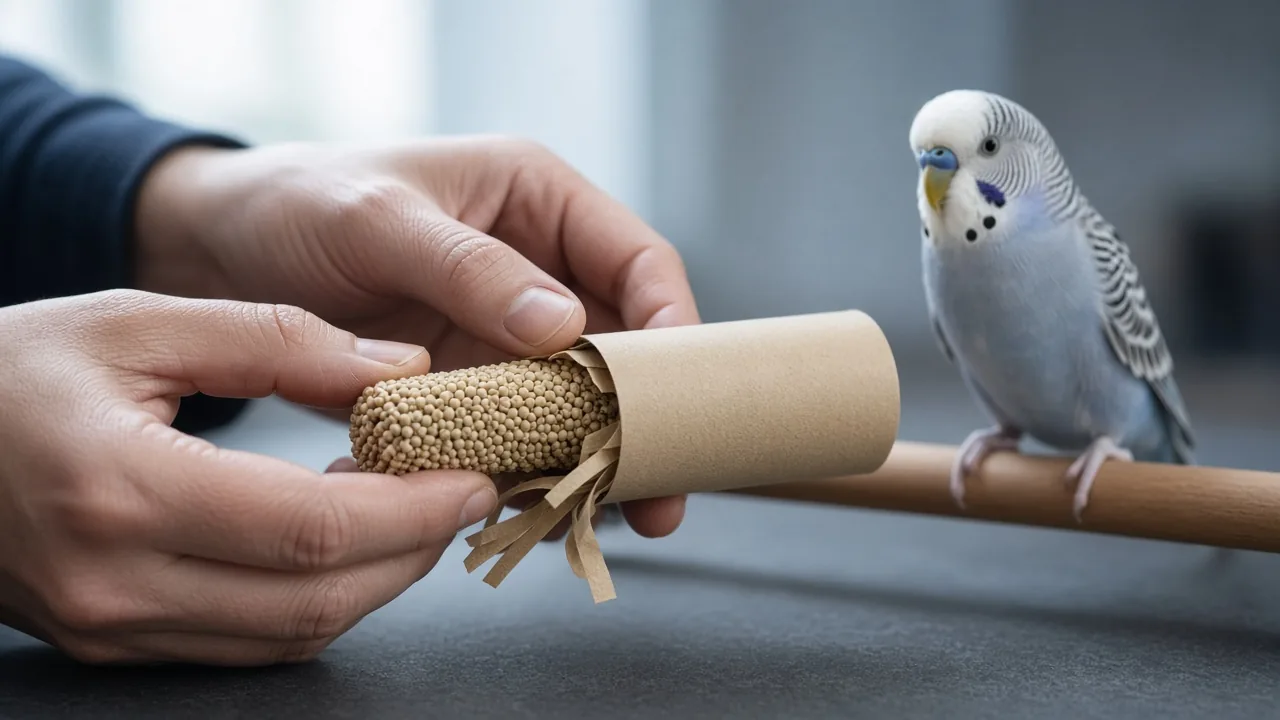
This is the simplest project on the list and a good starting point if you have never built a bird toy before. It uses paper coin wrappers, the kind meant for rolling loose change, stuffed with strips of paper and a treat like spray millet.
- Cut plain paper, computer paper, or colored cardstock into narrow strips.
- Thread a strip through the coin wrapper, pinching one end with your fingers so it does not slide out.
- Push a treat into the open end of the wrapper.
- Fold the wider end of the wrapper over to close it.
You can vary the filling depending on how your bird chews. Stuffing the whole wrapper with millet makes a treat-heavy version for a bird new to foraging. Filling it with only paper strips, no treats at all, gives a shredding-only option for a bird that chews harder and faster than it eats.
How to Build a Beaded Cupcake Liner Hanging Toy
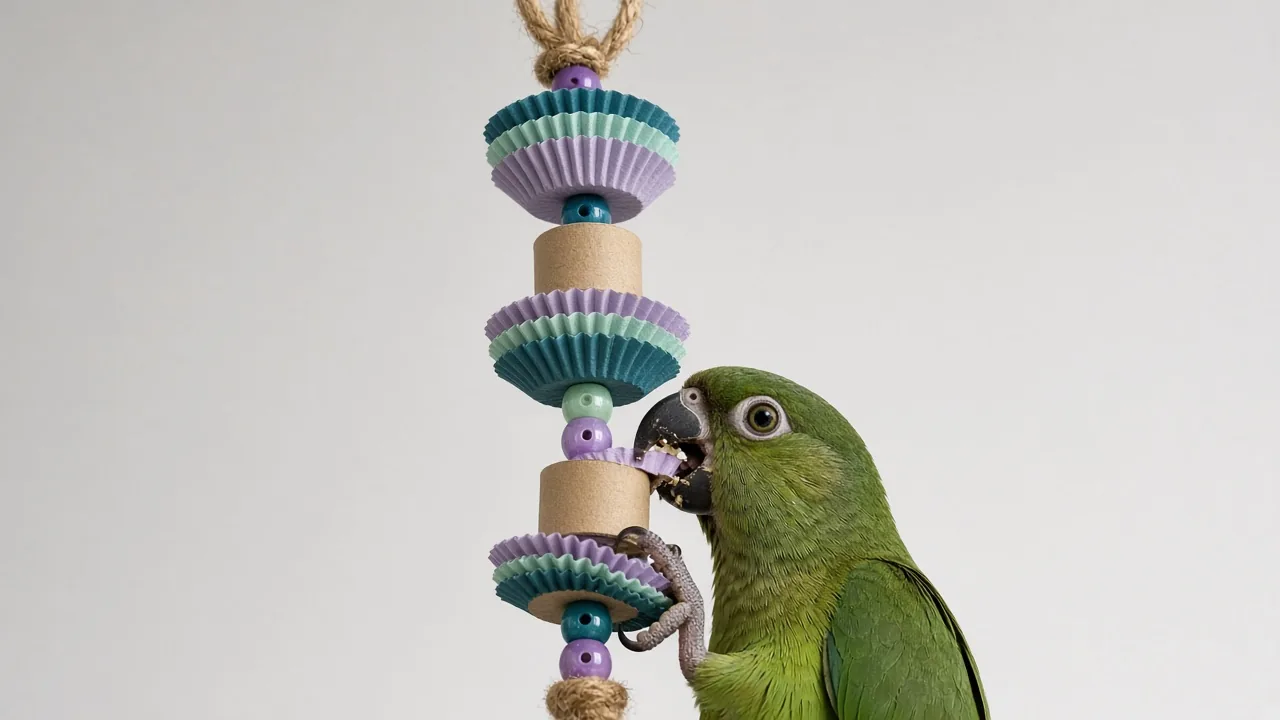
This project takes more time and a bit more hand dexterity than the coin wrapper toy, but it does not require drilling, which makes it a reasonable second project to try.
- Take six cupcake liners and sort them into two stacks of three.
- Use a skewer to poke a hole through the center of each stack.
- Flatten several coin wrappers and snip a small triangular notch at each end so a cord can pass through.
- Cut about one foot of jute twine and tie a knot at one end.
- Thread on a bead, then the first cupcake liner stack facing downward.
- Alternate beads and stuffed coin wrappers along the twine (four coin wrappers works well).
- Add the second cupcake liner stack facing upward, followed by a final bead.
- Tie a knot to hold everything in place, then form a loop at the top end for hanging.
Stuff the coin wrappers with paper strips before threading them, and tuck in a treat if you want to raise the difficulty. The liners flutter and crinkle when a bird works at them, which tends to hold attention longer than a static toy.
How to Turn an Old Book Into a Shredding Toy
An old paperback, especially a word puzzle book, phone book, or anything you were going to recycle anyway, can become a shredding toy for a bird that chews hard and often.
- Open the book to a random page and tear it about halfway.
- Fold the torn section downward so part of the page sticks out even when the book is closed.
- Repeat this on pages throughout the book so torn paper sticks out on multiple sides.
- Drill two holes near the book’s spine, sized just wide enough for jute twine to pass through.
- Thread twine through the holes and tie it off, using a spare clip from an old toy if you have one to make hanging easier.
Drilling is the step most likely to cause a hand injury if you rush it. Brace the book against something solid, keep your free hand well away from the drill path, and go slowly rather than trying to force the bit through in one motion.
How to Make a Beginner Foraging Cup With a Lid
A small sauce cup with a lid, the kind meant for condiments, makes an easy foraging cup that also happens to be simple to clean because the lid keeps crumbs contained.
- Place a treat, such as spray millet, in the bottom of the cup.
- Add a few plastic beads on top.
- Cover everything with shredded paper strips.
- Snap the lid on if your bird is ready for the added challenge of removing it.
If your bird has never foraged before, start with the treat and beads visible and skip the paper layer entirely for the first few tries. Once your bird is reliably digging through the cup, add more paper coverage, and introduce the lid last. This step-by-step progression matters because a bird that gives up on the first try may not attempt foraging again for a while.
How to Make a Hanging Shot Glass Foraging Toy
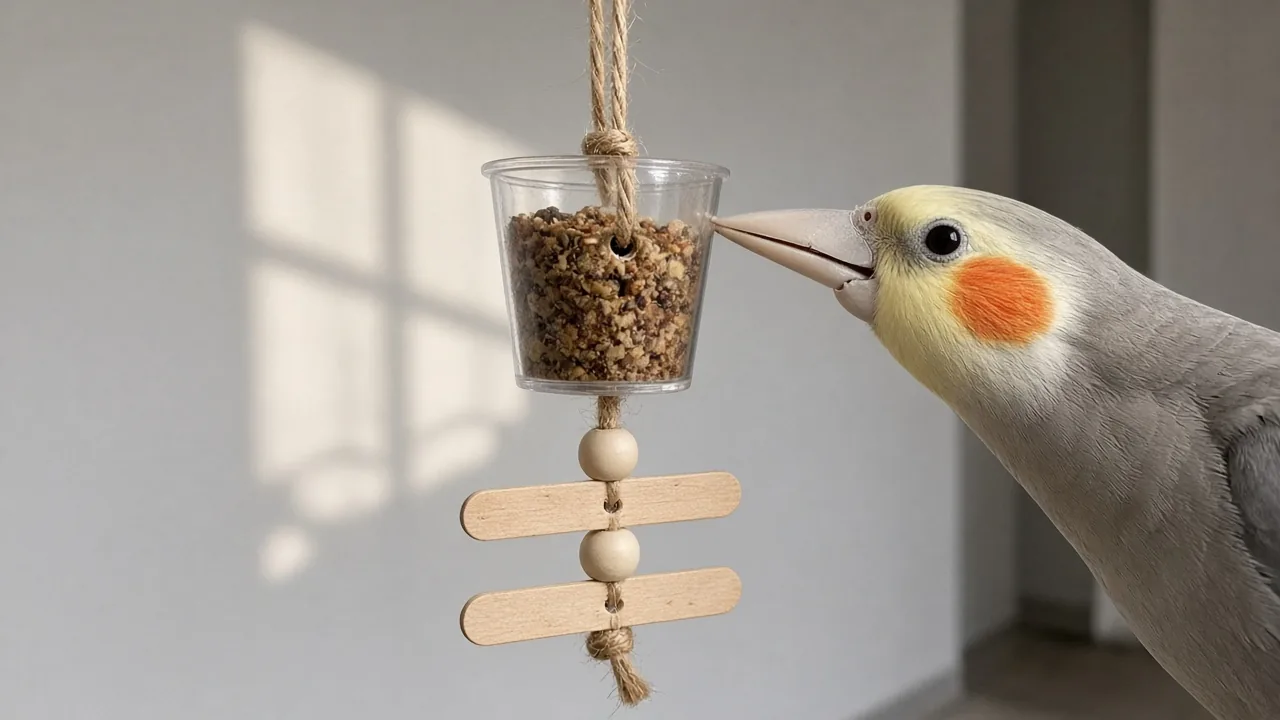
A clear plastic shot glass, hung from twine with beads and popsicle sticks threaded below it, lets you see at a glance how much of the treat inside has been worked out.
- Cut a couple of popsicle sticks in half and drill a small hole through each half.
- Carefully and slowly drill a hole through the center of the shot glass’s base. Clear plastic can crack if you drill too fast, so ease into it.
- Tie two knots at one end of a length of jute twine.
- Thread on a bead, then pass the twine through the hole in the cup’s base.
- Thread on the popsicle stick halves, then another bead.
- Tie a final knot to secure everything.
- Form a loop at the top for hanging, or repeat the steps below the first cup for a double-cup version.
For a larger parrot, swap the shot glass for a bigger clear plastic cup and scale up the beads and popsicle stick pieces to match. Fill the cup with a treat before hanging it, and keep in mind that some owners have noticed their birds chewing through the wood of the popsicle sticks fast enough to produce small splinters, which is worth watching for with any wood-based piece.
How to Choose the Right DIY Toy for Your Bird’s Size and Chewing Style
Not every project here suits every bird. A timid nibbler and a strong chewer need different starting points, and matching the toy to your bird’s habits up front saves you from rebuilding it a day later.
| Toy | Main Material | Chew Intensity | Suitable Bird Size | Cleaning | Play Style |
|---|---|---|---|---|---|
| Coin wrapper toy | Paper, coin wrappers | Low to moderate | Small to medium | Toss and replace | Shredding, treat retrieval |
| Cupcake liner hanging toy | Paper liners, beads, jute | Moderate | Medium to large | Spot wipe, replace twine | Shredding, swinging, foraging |
| Book shredding toy | Paper pages, jute | High | Medium to large, strong chewers | Replace when shredded | Shredding |
| Lidded foraging cup | Plastic cup, beads, paper | Low | Any size, good for beginners | Wash cup and lid | Foraging, problem-solving |
| Hanging shot glass toy | Clear plastic, wood sticks, beads | Moderate to high | Medium to large | Wash cup, check wood pieces | Foraging, chewing |
A small bird with a gentle beak, such as a budgie or parrotlet, tends to do better with the coin wrapper toy and the lidded foraging cup, since both avoid hard plastic beads being bitten with full force. A larger parrot with a stronger beak, like a conure or amazon, can usually handle the beaded projects and the book shredder without cracking components into unsafe pieces.
Common Mistakes to Avoid When Making DIY Bird Toys
A few errors come up often enough with homemade bird toys that they are worth calling out before you start cutting and drilling.
- Drilling without bracing your hand. A drill bit can slip the moment it breaks through plastic or wood, and an unbraced hand is in the path when that happens. Hold the material against a stable surface and keep your fingers clear of where the bit will exit.
- Choosing wood that splinters into chokable pieces. Soft or untreated wood, including some popsicle sticks, can shred into small sharp fragments under a determined beak. Watch any wood-based toy closely during the first few uses, and remove it if you see splintering rather than clean chew marks.
- Skipping a safety check before hanging a new toy. Tug on every knot, check that beads are seated firmly, and run your fingers along cut edges before the toy goes in the cage. A loose knot or a sharp plastic edge is far easier to fix on the workbench than after your bird has already been playing with it.
How Often to Check and Replace DIY Foraging Toys
Homemade toys generally need closer and more frequent inspection than store-bought ones, partly because materials like paper and jute are not built for durability the way some commercial toys are.
Check each toy every few days for:
- Splinters or sharp broken edges on wood pieces
- Beads that have cracked, chipped, or come loose from the twine
- Frayed or unraveling jute twine, especially near knots
- Buildup of droppings or food residue that is slow to clean off
A bird with a strong, fast chew can go through a paper or jute-based toy within a day or two, while a gentler chewer might get a week or more out of the same project. One owner who tracked this found that the softer paper and cupcake liner toys held up fine for a light chewer but needed replacing within days for a bird that worked through material quickly. Replace a toy the moment it shows loose parts rather than waiting for it to fail completely.
Setting Up a Safe Cage Environment Before Adding New Toys
New toys only help if the cage around them is already set up safely, especially for a young bird that is still growing into its coordination.
A young bird generally needs a cage with sides measuring at least about 24 inches, built with horizontal stainless steel bars that give it room to climb and stretch its wings. Perch placement matters just as much as cage size. Perches set too high in a narrow cage have led to falls that caused serious injury, so keep perches lower and spaced out rather than stacked near the top.
Temperature is part of the environment, too, particularly for unfeathered or partly feathered chicks. A cage temperature that drops below roughly 80°F can lead to a chick developing a runny nose, even if it already has some feathers. A fully feathered chick usually does fine with a heat lamp or a warming pad, while a chick that is still mostly bald needs a thermostat-controlled brooder to hold a steady temperature. Keep a thermometer positioned where the chick spends most of its time, since cage corners and open areas can read very differently.
How to Introduce New Toys to a Newly Adopted or Young Bird
A newly adopted or young bird is already adjusting to a lot at once, so adding too many new toys at the same time can turn into one more source of stress rather than enrichment.
Introduce one new toy at a time and stay in the room to watch how your bird reacts to it. This matters even more during the first 14 to 30 days after bringing a new bird home, which is also typically used as a quarantine period to protect any birds you already own from illness your new bird might be carrying.
If your young bird is also in the middle of a diet transition, such as moving from a hand-feeding formula to solid food, it helps to hold off on big toy changes until that transition is further along. Diet changes are generally spread out over at least a week to avoid digestive upset, and a bird dealing with new food is often less interested in exploring a new toy anyway. Once the diet has settled and your bird has cleared quarantine, you can start layering in the foraging projects above one at a time.
FAQ: Quick Answers About DIY Foraging Toys for Budget Bird Owners
Are wood-based DIY toys risky for birds?
Wood itself is not off-limits, but some pieces, including thin wood like popsicle sticks, can splinter into sharp fragments once a bird chews through them repeatedly. Watch any wood-based toy during its first several uses and pull it if you see jagged splinters rather than soft chew marks.
Can I budget for perches the same way I budget for these toys?
Not entirely. Foraging toys are easy to build from paper, jute, and plastic cups, but a safe perch usually needs wood that is the right diameter and texture for your bird’s feet, which is harder to source reliably from dollar store shelves. Many owners end up buying perches separately rather than making them, since getting the material wrong can affect foot health.
How do I tell normal chewing from a safety problem?
Normal chewing produces shredded paper, bent cardboard, and worn-down jute, all expected signs of a toy being used the way it is meant to be used. A safety problem looks different: sharp wood splinters, a cracked bead with jagged edges, a twine knot that has worked loose, or small plastic fragments breaking off. If you see any of those, remove the toy right away rather than waiting to see if it gets worse.
Watch how your own bird actually plays, whether it shreds everything in sight, forages patiently, or chews hard and fast, before deciding which project to build first. Check every DIY toy regularly for wear and swap it out the moment it looks compromised, the same habit worth keeping up with any toy rotation or safety check you run on the rest of your bird’s cage setup.
This article is for general information only and is not a substitute for advice from your veterinarian. Always supervise your pet with a new toy, and replace any toy that is damaged or small enough to swallow.

Contributor
admin
Continue reading
All stories
SMALL PETS & BIRDS · 11 October
Do Birds Need a Ceramic Heat Lamp Without a Heat Box or School Heater This Winter?
SMALL PETS & BIRDS · 11 October
Can Rabbits Use Cat Litter Safely? What Every Owner Should Know
SMALL PETS & BIRDS · 11 October
Responses
Moderated discussion