SMALL PETS & BIRDS
How to Build a DIY Acrylic Hamster Cage: Costs and Mistakes
A practical guide to building your own acrylic hamster cage, covering ideal dimensions, aluminum frame assembly, material comparisons, and realistic costs. Learn where most DIY builds go wrong before you start cutting.
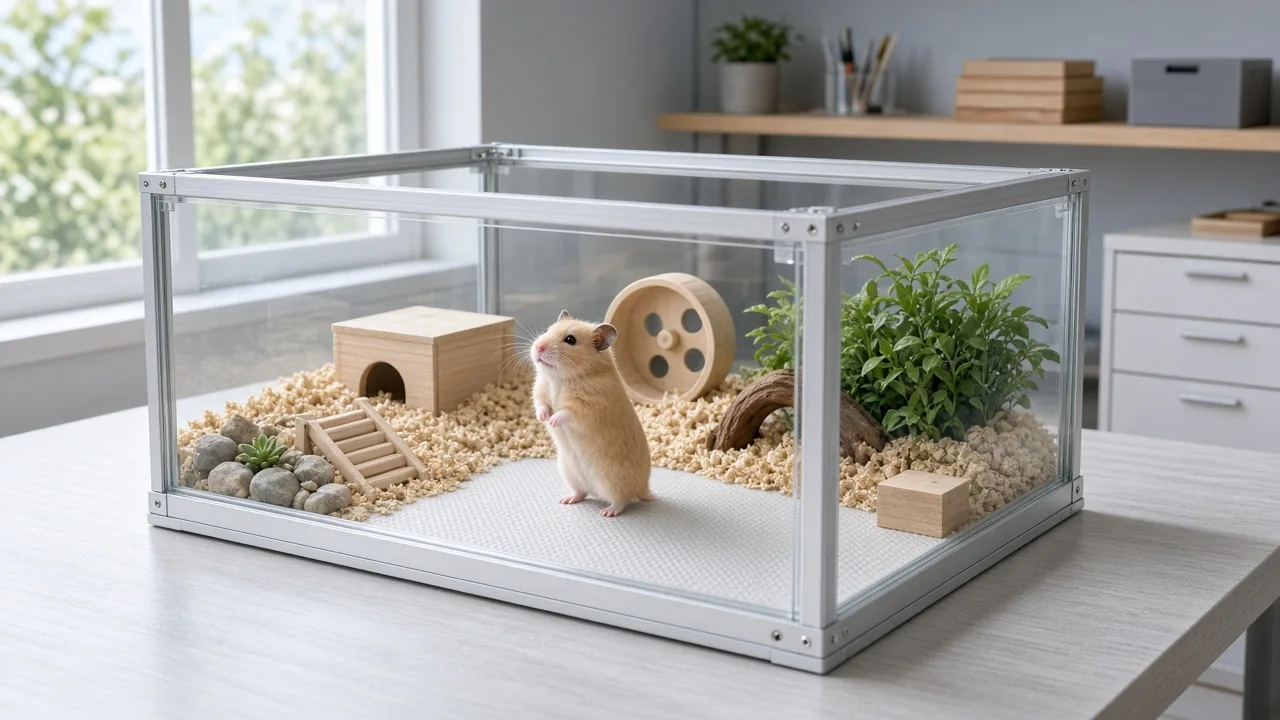
If you’re deciding between a DIY acrylic hamster cage and a ready-made kit, the choice mostly comes down to space, budget, and how much setup work you want to take on. Learning how to build a DIY acrylic hamster cage lets you set the exact length, width, and height your hamster needs, instead of settling for whatever a manufacturer offers. It takes more planning than opening a box, but most owners who try it finish in an afternoon once they know where the common mistakes hide.
This guide walks through both routes, the materials that hold up best, a realistic cost range, and the specific steps where DIY builds tend to go wrong.
DIY Acrylic Cage vs Pre-Made Kit: Which Fits Your Situation
A pre-made kit gets your hamster into a finished habitat the same day you open the box. A DIY frame takes longer to plan and assemble, but it gives you full control over size, materials, and layout. Which one makes sense depends on how much your hamster’s current setup is actually working.
If a store-bought bin or kit already fits your hamster comfortably and you don’t mind the limited visibility, there’s no real reason to switch. If you’re outgrowing a small enclosure or frustrated that you can’t see your hamster through opaque plastic walls, building your own frame solves both problems at once.
What a Pre-Made Kit Setup Actually Involves
A typical hamster habitat kit arrives with the cage body, vertical support posts, a clear plastic panel (often marketed as glass but usually a transparent plastic), ramps, shelves, a water bottle, bedding, and a wooden maze or similar enrichment piece. Assembly follows a printed instruction sheet: you slot the posts together, secure them with plastic pins and nuts, build any exercise wheel components, attach shelves and ramps for climbing between levels, and snap in the clear panel to close off the enclosure.
Once the structure is together, you fit the water bottle (pull the label off the nozzle first so your hamster doesn’t chew on it), add bedding, and set the maze or hideout inside before introducing your hamster. The whole process usually takes less than an hour, since every part is pre-cut and sized to match.
The tradeoff is customization. You get whatever footprint and height the kit was designed for, and if your hamster is a serious climber or needs more floor space than the kit provides, you’re stuck working within those limits.
Why Some Owners Choose to Build Their Own Cage Instead
Two complaints tend to push owners toward a DIY acrylic hamster cage. The first is visibility: many plastic storage bins marketed for hamster housing are tinted or frosted enough that you can’t easily watch your hamster from across the room. The second is size. One owner found that a bin advertised as roughly 31 inches long actually measured closer to 23.6 inches once she unpacked it, which left far less usable floor space than expected.
Buying a finished acrylic enclosure online can also cost more than building the frame yourself, especially once you factor in shipping for something that large and fragile. For owners who want a specific footprint, full visibility on at least one side, and a lower total cost, assembling an aluminum-frame cage with acrylic and PP board panels becomes the more appealing option even though it takes more hands-on work.
How to Plan Your DIY Acrylic Hamster Cage Dimensions
Before buying any materials, settle on your final length, width, and height. Going slightly larger than the minimum gives you room to add a hideout, wheel, and digging substrate without crowding your hamster, and it’s much easier to oversize at the planning stage than to extend a frame after it’s built.
Height matters more than it looks on paper. One builder settled on a cage roughly 39 inches long, 15.7 inches wide, and 19.7 inches tall, and recommends not going below about 19.7 inches. Once you add a few inches of bedding for digging, a shorter wall leaves less vertical clearance, and a determined hamster can use a bedding pile as a launching point to climb or jump out.
A few sizing guidelines worth following:
- Keep the floor footprint as large as your space allows; more floor area usually matters more to a hamster’s day-to-day activity than height.
- Treat 19.7 inches as a practical minimum wall height once bedding depth is factored in.
- Leave enough clearance for a wheel, hideout, and chew enrichment without the layout feeling cramped.
Choosing Materials: Aluminum Frame, Acrylic, and PP Board Compared
Most DIY builds combine three materials: an aluminum frame for structure, acrylic panels for the visible walls, and a PP (polypropylene) board for the floor. Each one is doing a specific job, and swapping any of them changes durability, cost, or cleaning in a different direction.
| Material | Best Used For | Durability | Chew Resistance | Cleaning | Relative Cost |
|---|---|---|---|---|---|
| Aluminum frame | Structural skeleton | High; holds panels securely over time | Not chewable, protects joints | Wipes clean easily | Mid-range |
| Acrylic panel | Side and front walls | Good if thick enough (around 1/8 inch) | Moderate; can show chew marks over time | Easy to wipe, shows scratches | Mid-range |
| PP board | Floor base | Holds up well to moisture and weight | High | Easy to wipe, resists odor buildup | Lower cost |
| Wood | Floor or accents | Degrades with moisture exposure | Hamsters chew it readily | Harder to fully sanitize | Lower cost |
| Metal sheet | Floor (less common) | Very durable | High | Easy to wipe | Mid-range |
Why an Aluminum Frame Beats Glue or Drilled Panels
Some owners try to skip the frame entirely by gluing acrylic panels together or drilling through the acrylic to bolt panels directly. Both approaches tend to cause problems. Glued joints can loosen over time, leaving gaps a hamster can work at with its teeth, and drilled holes weaken the acrylic sheet right where the connection needs to be strongest.
An aluminum frame avoids both issues because the panels sit inside a track rather than relying on an adhesive bond or a drilled hole. When shopping for aluminum rails, you’ll see sizing like "2020," which refers to the overall profile width (about 0.8 inch) and wall thickness (around 1.5 mm). A thicker profile holds up better and costs a bit more; some owners have found a lighter "1515" profile adequate for a smaller build if you’re trying to trim costs, though it offers less margin for error on a larger cage.
The extra planning this requires is the main downside. You need to calculate rail lengths, order connectors, and sometimes have the hardware shop pre-drill threaded holes, which adds a step most kit buyers never have to think about.
PP Board vs Acrylic vs Wood vs Metal for the Base
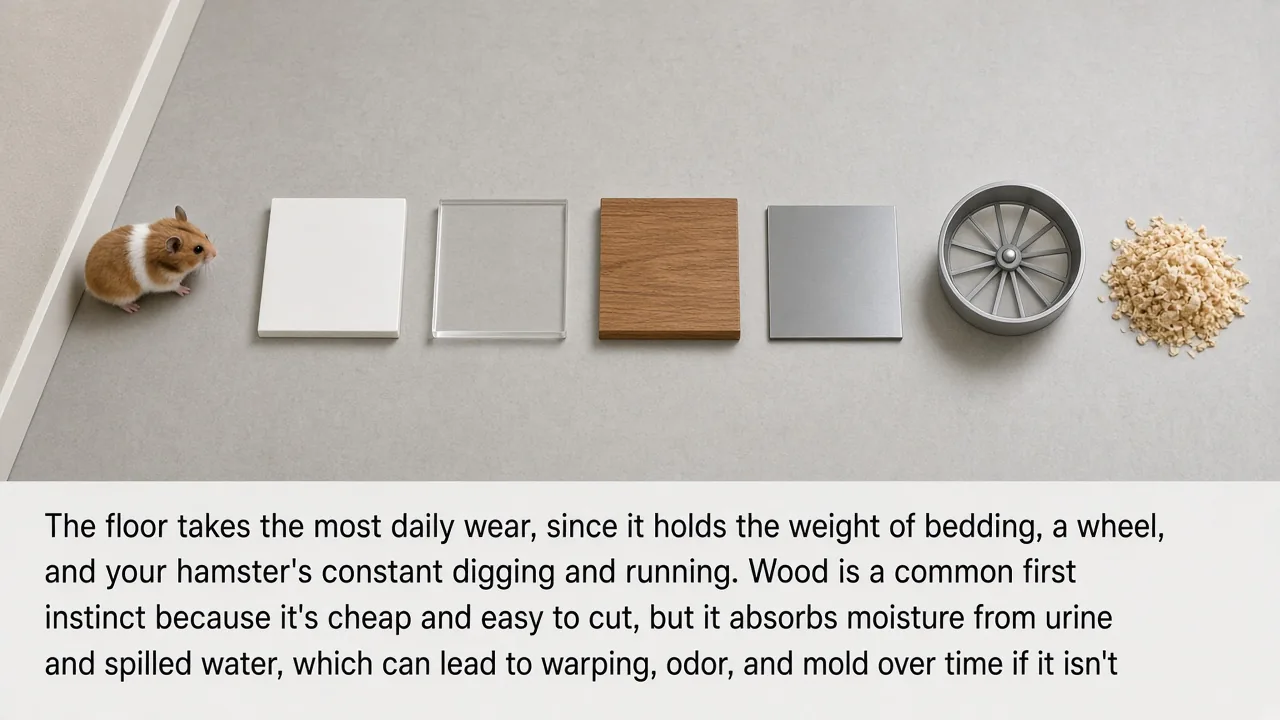
The floor takes the most daily wear, since it holds the weight of bedding, a wheel, and your hamster’s constant digging and running. Wood is a common first instinct because it’s cheap and easy to cut, but it absorbs moisture from urine and spilled water, which can lead to warping, odor, and mold over time if it isn’t sealed well. Thin metal sheeting is durable but can feel uncomfortably cold in a chilly room during winter.
A PP board strikes a better balance for most builds. It resists moisture better than untreated wood, doesn’t carry the same mold concerns, and avoids the formaldehyde questions that come up with some composite wood products. A thicker PP board (around 1/4 inch) also helps dampen the noise and vibration from a running wheel, which matters if the cage sits somewhere you spend time.
Acrylic can technically work as a floor material too, but it tends to cost more than PP board for the same thickness, so most builds reserve acrylic for the visible walls and use PP board underneath.
How to Build a DIY Acrylic Hamster Cage: Step-by-Step Assembly
Once your dimensions and materials are settled, assembly itself is fairly quick, often around half an hour, as long as every piece was cut to the right size beforehand. Problems almost always trace back to measuring or cutting errors made before assembly day, not the assembly itself.
- Confirm your final length, width, and height, and double-check them against your floor space before ordering anything.
- Order aluminum rails cut to the correct lengths (see below), along with corner connectors and matching bolts.
- Have your acrylic and PP board panels cut to size, with corner notches included if your connectors require them.
- Assemble the base frame first, then attach the side and front panels.
- Reinforce the top of an open design with bolts and cord, or add a top rail if you want extra rigidity.
- Insert edge strips around any panel that fits loosely in the frame track.
- Check every joint and panel edge for gaps, sharp corners, or looseness before adding bedding and your hamster.
Cutting Aluminum Rails to the Right Length
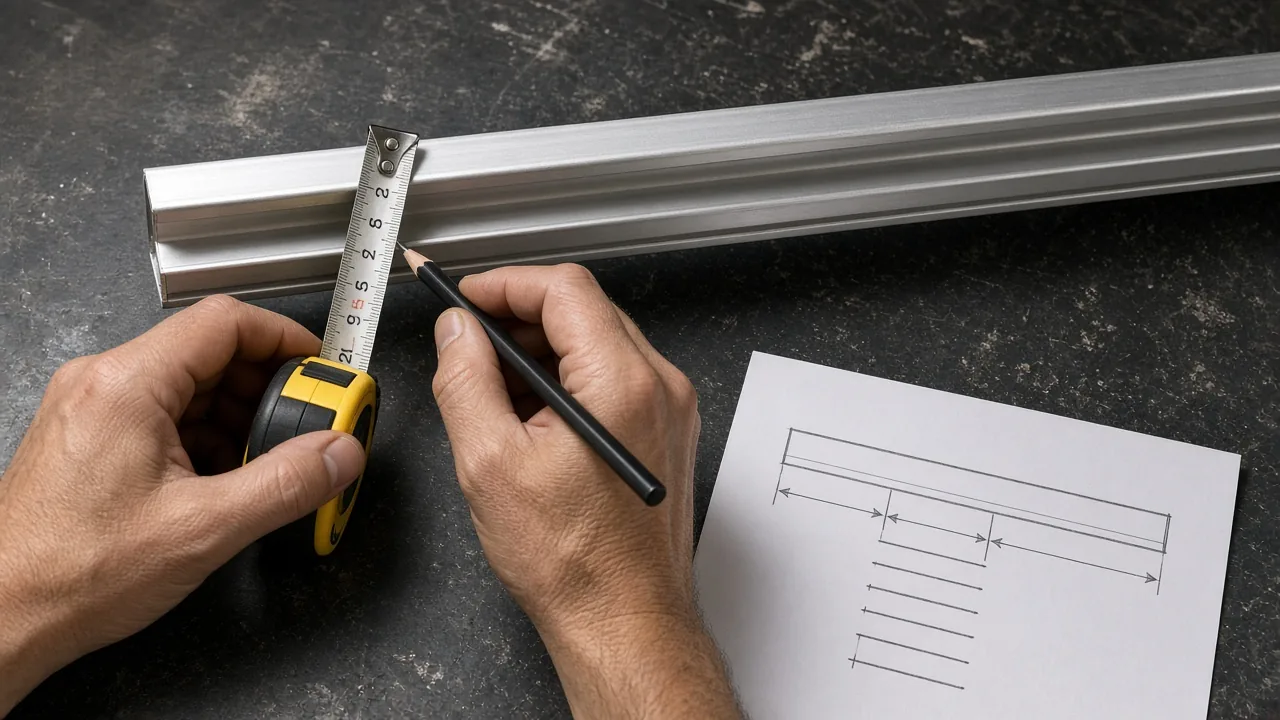
This is the step most DIY builders get wrong on their first attempt. Each rail needs to be cut slightly shorter than your target dimension, by about 0.4 inch, to account for how the corner connectors add length when everything is assembled. If you order rails cut to your exact target size, the finished frame ends up too large and the panels won’t sit flush.
For a cage roughly 39 inches by 15.7 inches by 19.7 inches, that means ordering two rails at about 39 inches, two at about 15.4 inches, and four at about 19.3 inches, rather than cutting straight to the full target measurements. It’s worth writing out every rail length on paper and double-checking the math before you place an order, since a hardware shop will cut exactly what you tell them, mistakes included.
Connecting Corners and Reinforcing an Open-Top Design
An open-top cage without a lid panel needs eight aluminum rails total: four vertical posts for the corners and four more forming a bottom perimeter. Three-way connectors at the four bottom corners handle most of the structural work, with each connector secured by a few screws.
The rail ends also need threaded centers so you can bolt them together; most hardware shops can add this threading when they cut your rails, so it’s worth asking for it up front rather than drilling it yourself later.
Because an open-top design has no lid to brace the frame, the top can feel a little wobbly without extra reinforcement. Adding bolts at the top of each post and tying them together with cord adds meaningful stability. If you want a sturdier result and don’t mind the added cost, running a full rail around the top perimeter, the same way the bottom is framed, gives you a more rigid structure overall.
Fitting Panels Without Gaps or Rattling Noises
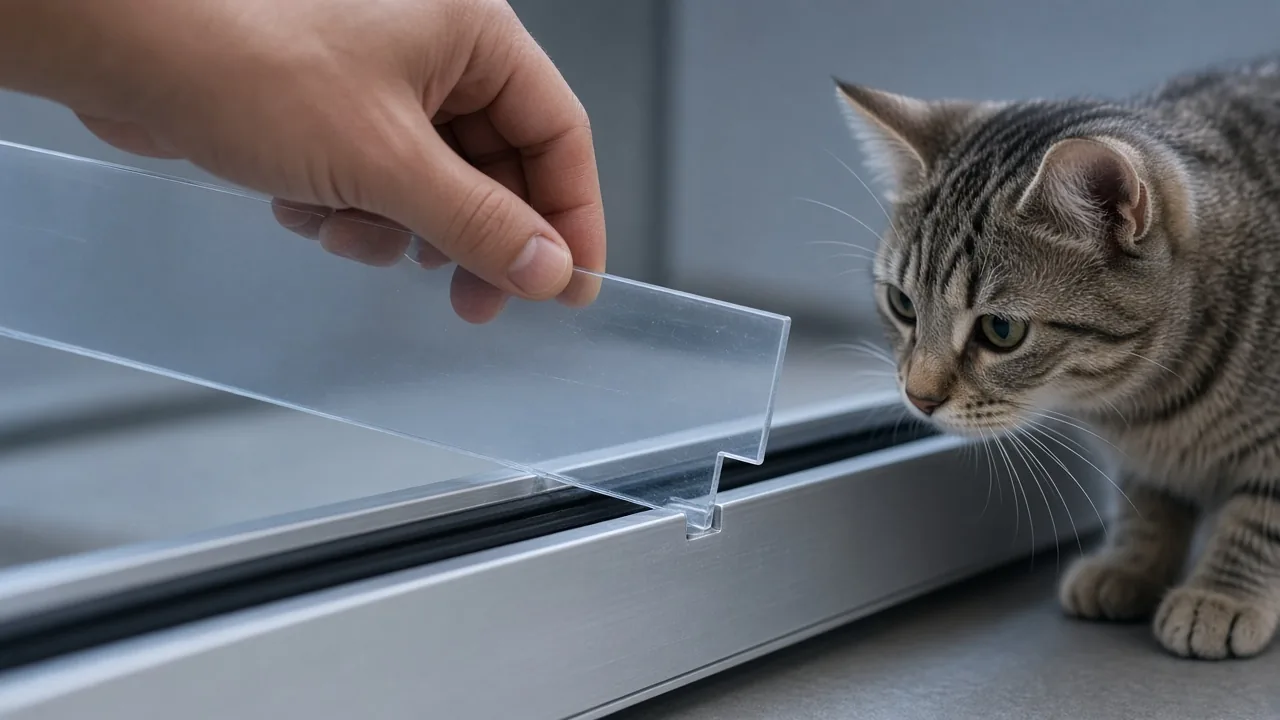
Aluminum connectors leave a small raised bump where they join the rails, and if your acrylic or PP panels don’t account for that bump, the corners won’t sit flat. Every panel typically needs a small notch, about 0.2 inch by 0.2 inch, cut out of each corner so it clears the connector. Skipping this step is a common mistake, and the result is a panel that catches on the bump and makes a repeated clicking sound every time the cage flexes or shifts slightly.
A separate issue shows up because acrylic panels are often thinner than the frame’s internal track width, which leaves them loose enough to rattle. Edge strips, pressed into the frame around the panel from the outside, take up that extra space and hold the panel snug. If you find the strips difficult to seat, some builders have had success sealing the gap with aquarium-safe silicone instead, though that trades easy disassembly for a more permanent fit.
How Much Does a DIY Acrylic Hamster Cage Cost to Build
Costs vary quite a bit depending on cage size, material thickness, and how many mistakes you make along the way. One builder’s roughly 39-by-15.7-by-19.7-inch cage, built with 2020-profile aluminum, 1/4-inch PP board, and 1/8-inch acrylic panels, came out to around $30 total for materials.
Other owners following a similar approach have landed in a comparable range, with one reader estimating about $35 using slightly different panel pricing. A smaller cage built by resizing an existing bin frame came out closer to $10, showing how much total cost depends on the size you’re targeting and whether you’re starting from scratch or reusing parts you already own.
Not everyone agrees that this counts as a budget option. Some readers have pointed out that a free fish tank or repurposed storage bin would cost far less than any from-scratch acrylic build, and that’s a fair point if visibility and exact sizing aren’t priorities for you. The DIY route makes the most financial sense when you specifically need a custom footprint or full-panel visibility that a free or secondhand container can’t offer.
A few things that reliably push the cost up:
- Choosing a thicker aluminum profile (2020 instead of 1515) for extra sturdiness.
- Going larger than the minimum footprint, since more panel area means more material.
- Reordering parts after a measurement mistake, since most hardware shops won’t take custom-cut pieces back.
Cheaper and Simpler Alternatives Worth Considering
If the full build feels like more than you want to take on, a few shortcuts can cut cost or effort without losing the core benefits of a custom enclosure.
Switching to a lighter 1515 aluminum profile instead of 2020 can shave material cost, particularly on a smaller cage where the extra sturdiness of a thicker profile matters less. L-shaped corner brackets are another option worth considering, since they can eliminate the notching step on every panel corner, trading a small amount of design flexibility for noticeably less prep work.
If visibility is your main goal rather than a fully custom frame, a polished storage bin is worth a look. One owner found that buffing and waxing a clear storage bin brought its transparency from roughly 75 percent up to around 90 percent, compared to fully clear acrylic at 100 percent. That’s not identical to acrylic, but it closes much of the gap for a fraction of the effort, and it keeps the bin’s built-in portability and easy cleaning.
Before buying any materials for either the full build or a shortcut version, it’s worth sketching out your exact rail lengths and panel sizes on paper, or using free 3D planning software if you’re comfortable with it. Catching a measurement error before you order is far cheaper than catching it after the aluminum arrives.
FAQ: Quick Answers About Building a Hamster Cage Yourself
Can a hamster escape a cage with 20-inch walls?
Walls around 19.7 inches tall are generally considered a workable minimum, but height alone isn’t the full picture. If bedding is piled high or there’s a wheel or shelf near the top edge, a determined hamster can use it to climb higher than you’d expect, so leave some buffer above whatever bedding depth you plan to use.
Do I need advanced DIY skills to build this?
Not really, based on how most owners describe the process, but careful measuring matters more than hand skill. Most of the common mistakes happen on paper, miscalculating rail lengths or forgetting panel notches, rather than during the actual assembly, which tends to take about half an hour once the parts are cut correctly.
Are cheaper material swaps, like thinner acrylic or a lighter aluminum profile, safe?
Generally yes for a reasonably sized cage, as long as the frame still holds together solidly and no panel edges are left sharp or loose enough for your hamster to chew through. Check every joint and seam after assembly, and recheck periodically, since any swap that trades sturdiness for savings is only a good deal if it still holds up over time.
Before you commit to a design, watch how your hamster climbs, digs, and chews so you can choose dimensions and materials that hold up, and recheck the cage regularly for loose connectors or sharp edges.
This article is for general information only and is not a substitute for advice from your veterinarian. Always supervise your pet with a new toy, and replace any toy that is damaged or small enough to swallow.

Contributor
admin
Continue reading
All stories
SMALL PETS & BIRDS · 11 October
Why Does My Hamster Keep Digging Out of Its House? What Owners Observe
SMALL PETS & BIRDS · 11 October
What Size Wheel Does a Hamster Need to Stay Healthy and Safe
SMALL PETS & BIRDS · 11 October
Responses
Moderated discussion